Tattoos

This is a tale of trying to make panoramic scans of decorated limbs. It started as one of those mad musings on wether I could take a picture in a certain way, that led to a bit of a rabbit hole.

The trigger was a visit to a tattoo show. Not that I have any tattoos, but I’d never been to a tattoo show before. Fascinating place and people. But what got me thinking was how a tattooist advertises their art. They obviously take pictures, but their subject is not flat, so it’s difficult to get a picture that shows the full tattoo. ‘Easy’ I thought ‘just rotate the limb in front of the camera’. If you combined a series of strips, each one running along the length of the limb, you could merge them into a complete panorama. How hard could it be?

So the first thing I did was to photograph a beer can. After emptying it, of course – art needs its muse. I set the camera up and took a series of pictures as I rotated the can in increments. There was a problem with the lighting though – the can was reflective. So I tried a Pringles tube instead (true art involves suffering). The concept worked but I needed a better background. And I had some bits of wood in the shed and a glint in my eye…

So I made a lighting trough. I made a hemispherical-section trough, lined with white card. The plan was that I could stand the trough on end and have someone place their arm down the trough, then rotate the arm as I took pictures. The curved white backdrop would bounce my flash and even-out the lighting. So I set off to charm the proprietor of a local tattoo shop into being my subject. Luckily they had lashings of ink and were a jolly good sport about trying something new.

Arms aren’t straight, either

The first problem is that arms don’t rotate at the shoulder: they twist at the elbow and forearm. So trying to rotate an arm about its long axis causes the skin to twist. This makes it very difficult to align the images.

Plan B was to get my subject to keep his arm straight but to walk around the trough. With a bit of shuffling of the trough and camera, we got a set of images. I then cropped each of into a central strip and tried aligning them in Photoshop. I could have just let Photoshop treat them as a panorama and align them automatically, but I had the idea in my head to have the back of the hand ‘normal’ and the forearm opening like a fan above it.

I stopped before finishing the merge and smoothing the edges.

And that’s the point I stopped, because it looked like a flayed arm. The results were meant to show a tattooed arm in the round, but the final picture wasn’t pleasant. It was also a load of work to produce the images and to combine them. I was at the limits of what my kit could do. It was like being back in the days of film: I didn’t know until the processing stage (combining the images) that they would even fit together. If one shot was off or distorted, it would mean a re-shoot.

If I was going to do this seriously, I think I would have to make a scanning rig that rotated around the limb. Something like a Raspberry Pi camera (or several) with the lens masked down to a slot. Surround the lens (or lenses) with a ringlight to get even illumination. Program the system to shoot a series of stills and then feed them to Photoshop to combine as a panorama, then crop to taste. You could make several rigs of different sizes: small for a hand and forearm, bigger for an arm, bigger again for a leg and even a torso or full-body scanner. But to put that much effort in I would have to be really interested in tattoos or to be selling pictures to people with tattoos as a business to support the costs.

It also turns out that the world caught up and lapped me – what I was trying to do was a manual version of an orbital camera rig. So if I was to use something like Raspberry Pi cameras I wouldn’t be breaking new ground. It would also be a lot easier to make a video scan than to assemble still images into a panorama, but the original idea was to have a final picture that could be printed.

So that’s my gift to the world: a method of taking pictures of people to make them look as though they have been flayed. No, you’re welcome.

Ready, fire, aim

After all my blathering about metering light and finding a good working light meter, I do have to ask why I bother?

It makes sense for analogue, because there is no way to tell at the time if I’ve got the exposure right. But for digital? The cost of an extra picture is effectively zero and I can review on the camera screen what I’ve taken. The camera will show blinkies to mark the areas of the image that are over or underexposed. So in effect I am getting the best light metering of all: a review of the whole scene and not just the part my meter saw. I know that the Zonistas will scan the scene with a spot meter to determine the full brightness range, but that takes time. While I’m calculating the dynamic range of the scene my subject has gone or the weather has changed. But a single picture on digital shows in one take where the highlights and shadows fall and if the range is too much for the sensor. That test picture also shows what the camera sensor sees, and not what my light meter or guesswork assumes.

I was never going to meter this accurately

There’s always the fear that the first ‘ranging shot’ is the best one, but was wasted because I was using it to test and didn’t compose or expose properly. Following the same analogy, metering carefully before taking the picture would be predicted fire, which is slower, involves calculations and may still miss. But the way to avoid a wasted first test shot is to take that first shot as though you meant it. Set the camera onto an automatic mode and the exposure will usually be right enough. Then you can chimp it on the camera screen and adjust as necessary.

But the camera put me right

Joe Edelman says this. I was going to say ‘agrees’, but it’s actually me agreeing with him rather than the other way round. He says to choose a shutter speed for the lens or action, an aperture for the effect, and let the camera choose an ISO to match. Take a shot and then use the exposure compensation control to get the exposure right by looking at the image.

So the message is that if you’re shooting digital, put the camera on auto and then shoot, chimp, change.

Forecasting the lens

Back when Real Photographers used prime lenses, we had to select and fit the right one for the job. None of this zooming to fill the frame luxury. But changing lenses is a faff, and changing lenses again to fit a better one is even faffier. So how do you work out which lens to use?

You could use maths if you can plan beforehand. If you know how big the subject is or what size you want your framing to be, and if you know how far away the subject is, then you can ‘easily’ calculate the required angle of view and pick the lens that provides it. So say I’m taking pictures of someone on stage 30m away, and I want them half-length with a full-frame (35mm format) camera to allow a bit of context or background around them. So my subject is about 1m high. A 35mm frame format has 3:2 proportions, so a landscape format shot of this subject will be about 1.5m wide. Do some sums and I will need a lens with a 50 mils angle of view. That’s a military measurement and translates to about 3 degrees. I’m going to need a lens longer than 500mm focal length, or I need to get closer. Working the formula backwards shows that if my longest lens is a 500mm, I need to be 20m away. Interestingly (true for small values of interest: I’m a bit of a nerd) if I used my 500mm lens at 30m but shot in portrait format, the frame would be roughly ok for a full-length picture of an adult. That’s the wonder of maths. But, while it’s useful when planning ahead, you don’t want to be doing sums instead of taking pictures.

So there’s another way to guess the lens that is reassuringly analogue and requires no calculations. It does require that you have your various lenses to hand, though (pun intended, as will be revealed). It’s an ideal afternoon activity with your camera and lenses, with a notebook and a suitable refreshment to hand. Fit the first lens. Look through the camera and find a subject that fits the width of the frame. Put the camera down and, without changing position, hold out your hand at arms length and close one eye. Find a combination of knuckles and spread fingers that covers the same field of view. Make a note. Change lenses and repeat.

Field of view of a 200mm lens

What you will get is a set of ready-reckoners for guessing the right lens. So when you look at a scene, you will be able to stretch out a hand or hands and know fairly well which lens will frame it. For example, I know that one fist with thumb and little finger bent is (for me) the field of view for a 135mm lens. A 300mm lens is the width of three knuckles, and so on. Yes, I know that a phone app like Magic Film Viewfinder can do this for different sensor/film sizes and lenses, but this manual method is quick. The Handy Lens Estimatorâ„¢ will obviously be personal to you, because of the size of your hands and length of your arms. I’m built like an orang-utan equipped with shovels for example, but you may be more compact. The method still works though. It works without batteries or an internet connection too, which is something to be increasingly appreciated.

Roughly fist width with my delicate paw at arm’s length.

My gift to the nation (except I learned it from an unknown source many years ago).

Those who can, teach

There’s a saying that “those who can, do; those who can’t, teach”. To which I’d answer, if you think you can do, try teaching. Think you know the exposure triangle? Explain it to a non-photographer. Try depth of field. Or try describing how lenses affect perspective to another photographer.

It’s a bit like the Golden Question. That’s about explaining to someone else what you see that makes you want to capture it. So this is the flipside: if you think you know how something works, explain it.

I’ve sat through many sessions where experienced photographers try to explain even the basics, where the result is an increase in confusion. I’ve also been taught some quite complicated things by people who knew how to teach. They helped me understand a basic model of the world within the subject, and then developed the model as I understood more. But it’s easy to think you know how the world works if you know the standard answers to the standard questions. Ask me what the aperture numbers mean on a lens and I can tell you that big numbers mean small holes. Ask me why the numbers increase in an odd progression, or why f4 is the same on different lenses, and I may not be able to answer.

This is called chauffeur knowledge. It means knowing all the words but not actually understanding what is behind them. Not that you need a deeper understanding to take good photographs. It is perfectly possible to be artistic and creative without being technical. Indeed, I’ve seen the anxiety that people can have when they feel they don’t understand how their camera works (when the self-styled gurus step in and make things even more confusing). Chauffeur knowledge can be perfectly suitable if you are driving a car. So knowing that increasing my aperture number means decreasing my shutter number is an excellent working rule that gets me through the day.

I’ve no problems with this. Where I do have a problem is the headline to this piece: when someone implies that teachers can’t do. Perhaps this gives them a smug sense of better? Or do they feel that people have to take-up teaching if they can’t be successful experts in the ‘real world’? To channel Feynman again, he said that you don’t really understand a subject unless you can explain it to someone who has no subject-knowledge. I’m not saying that you should be a technical expert, but don’t disparage teachers until you’ve tried teaching.

They lock the gate to protect the public. You will notice that the lock is on the outside.

You may have learned photography from excellent guides or be self-taught. If you want to test your understanding and have some idea of the subtle skill of teaching, try explaining what you know. And by this, don’t just replay a textbook or something you have read. Start from scratch and develop your own explanation, then test it by using it. If you can bring someone to your level of understanding in simple, logical steps, you know your stuff. And it will give you a sense of the Jedi skills of a good teacher, who can not only do but can create new doers. So how about changing the aphorism to ‘those who think they can do, try teaching’?

PS – I am not and have never been a teacher. But I know and have known some good ones. And some bad ones, obviously. But the good ones quietly make the world a better place.

Losing contact

I was given a copy of Magnum Contact Sheets for Christmas and reading the introduction is a poignant reminder of past processes. The contact sheet was the photographer’s or editor’s first view of the pictures. I started-out with film and I too remember the ritual of the cutting of the dried negatives into strips, the printing onto paper and the final review of the pictures with a magnifying glass and a cup of coffee. This was the time to choose between variations of a picture, to think about cropping and shading. The contact sheet showed a narrative of the order in which I saw things and how I explored the subject. Or more usually, a series of mistakes and near-misses.

This process has been easy to replicate with digital. My screen shows thumbnail images in date and time sequence. There is a lot less work involved, and the screen looks a bit like a traditional contact sheet. I generally look at them using IrfanView though – it lets me skip forwards and backwards through the sequence and is happy to display files in any format, including raw. Since we all tend to shoot more pictures with digital, this is an easy way to whizz through what used to fit on a single sheet of 10×8.

What the introduction to the Contact Sheets also described was the workflow of film-based news photographers getting their pictures back to the agency. Film might be developed locally by the photographer or trusted to some who could get it home. The photographer would send the film plus captions, or perhaps negatives, sometimes even a marked-up contact sheet. Otherwise it was down to the editor to choose the frame and the crop.

Then digital happened. Now the photographer can choose from the camera, transfer to their phone or laptop for a bit of tweaking and some captioning, and send immediately. I went to a talk by a sports photographer who shot football matches. He would be sending his first pictures before kick-off and had macros set up on his laptop to rapidly caption the pictures for sending. It was a treadmill, and he would expect to take hundreds of pictures for each match. He wore out his cameras, so renewed them regularly. He also had one camera fitted to each lens, to save the time of swapping lenses and missing a shot. Every other photographer at the match was doing the same, so to do any less meant not selling his pictures. That’s almost a caucus race.

The description of news photographers getting the pictures home reminded me of when I happened to be working for a newspaper group at the end of film but before the rise of the machines digital. They were working on faster turn-around from photographers in the field. What they built was a flight case containing a film scanner, a small laptop, a modem and a satellite phone. The photographer would shoot Polaroid’s Polachrome or Polapan film, which could be developed on the spot in a few minutes. Then they picked the frame, scanned and captioned it and sent it back over an expensive and slow link. But it worked. What I remember in particular though is one set of kit that was sent back damaged. It had been left in a hire car for security, but the car was in a street that suffered a car bomb. The flight case still had bits of shrapnel stuck in it and the kit inside looked like it had been machine-gunned. A reminder that these people worked in dangerous places (and that a lot more people lived in them). In the corner of the room where we were gawking at the wrecked kit was a PC that did the downloads from the agencies. We would constantly see developing disasters scrolling down the screen and know that a selection of this suffering would be tomorrow’s news.

It does beg the question though of whether the pressure to be the first or the most immediate is adding value? It takes time to send a photographer somewhere, whereas you can take a phone picture from a local witness immediately. So the newspapers fired their photographers and lost the ability to go into depth with a story.

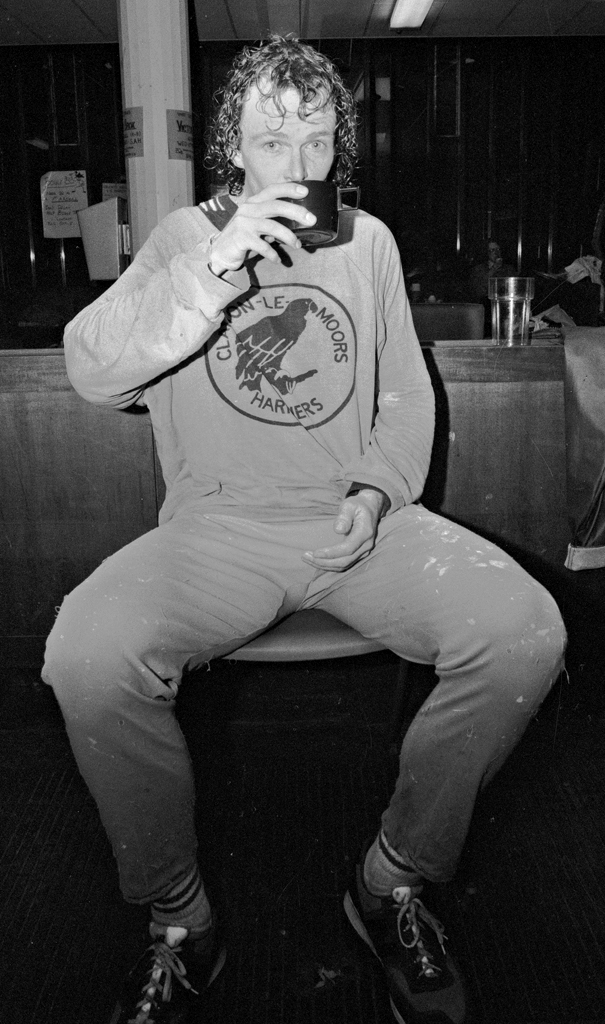
I had my own minor attempt at reporting from the cheap seats. The Manchester Universities (at the time they were separate) hold an annual overnight 55 mile sponsored walk. Each year at least one person runs it. So I thought to get a picture. I worked out when a runner was likely to arrive at the finish and went down to see. True enough, the first runner had just arrived. So I snapped a few pics, wrote a few details and dropped the film and notes off at the Manchester Evening News. They didn’t use the pictures but did put a small article inside. I got my negs back and a small cheque. This was enough for a takeaway for two that night, which made this student and girlfriend very happy. Perhaps if my photos had been any good it might have been a sliding-doors moment and pointed my life in a different direction? Why worry? I’ve had a great life and who’s to say a different track would be better? That’s beside the point though – for a brief moment I was a cheap stringer for the MEN. Incidentally, the guy who ran 55 miles seems to have been a fell and long distance runner. His name appears in multiple race results sheets on t’interweb so I guess for him it really was a stroll. (I’m not naming him, not without his agreement.)

First finisher, Bogle Stroll. 55 miles in 7.5 hours, wearing a paint-stained tracksuit and trainers. If you recognise him, drop me a line,

And for a relevant aside – I went back and found the pictures from my contact sheet files. I had a guess at the year and flicked through only a few pages before finding the pictures in March of the year I guessed. It was quicker than firing up the computer to do a search.

The finish of the Bogle Stroll. It was the day after the Week of Action, obviously,

But getting back to news media, I don’t think that immediacy has increased analysis. The ability of anyone to broadcast a picture through social media, bypassing any analysis and with the ability to mis-label or entirely construct an image means that we could be subject to a blizzard of instant images demanding our immediate and unconsidered response. One proposal seems to be to add a certificate of truth to images to prove that they were taken at the time and place claimed and have not been altered. Good luck with that. Even ‘unalterable’ film negatives could be staged and things only got easier with digital. I think we have to find our way back to experienced journalists we can trust: photographers and writers who can work together to explain the context and meaning of an event and help us understand it. The alternative is believing influencers who claim they saw crisis actors (and please also click on the link to buy their promoted vitamin supplements).

Ho hum. I’m off to look through my Magnum book and listen to some long-form news-analysis podcasts. And if anyone really wants to know, I can tell you why the moon landings were not faked.

More over-exposing

It took me a while, as I was mostly shooting digital, but I got around to trying more of the deliberate over-exposure as recommended by Johnny Patience.

This time I tortured some Agent Shadow 400, exposing at 200ISO and developing in 510-Pyro. Why this combination? Because I had the film to hand and the developer has become my favourite, if only for its keeping properties.

And I was impressed. One particular shot was of a couple of people talking. One was wearing a black tee shirt, the other a white shirt. This is the traditional horror of wedding photographers: how to show detail in the dress while not making the groom look like a black hole in a top hat. But the film captured gradations in the highlights on the white shirt and detail in the shadows and folds of the tee shirt. Nice.

Don’t know how well it will show-up, but there is gradation in both the white and black areas.

This was without using the full power of the 510-pyro, as I used standard Ilford agitation and not the semi-stand method that brings out the magic.

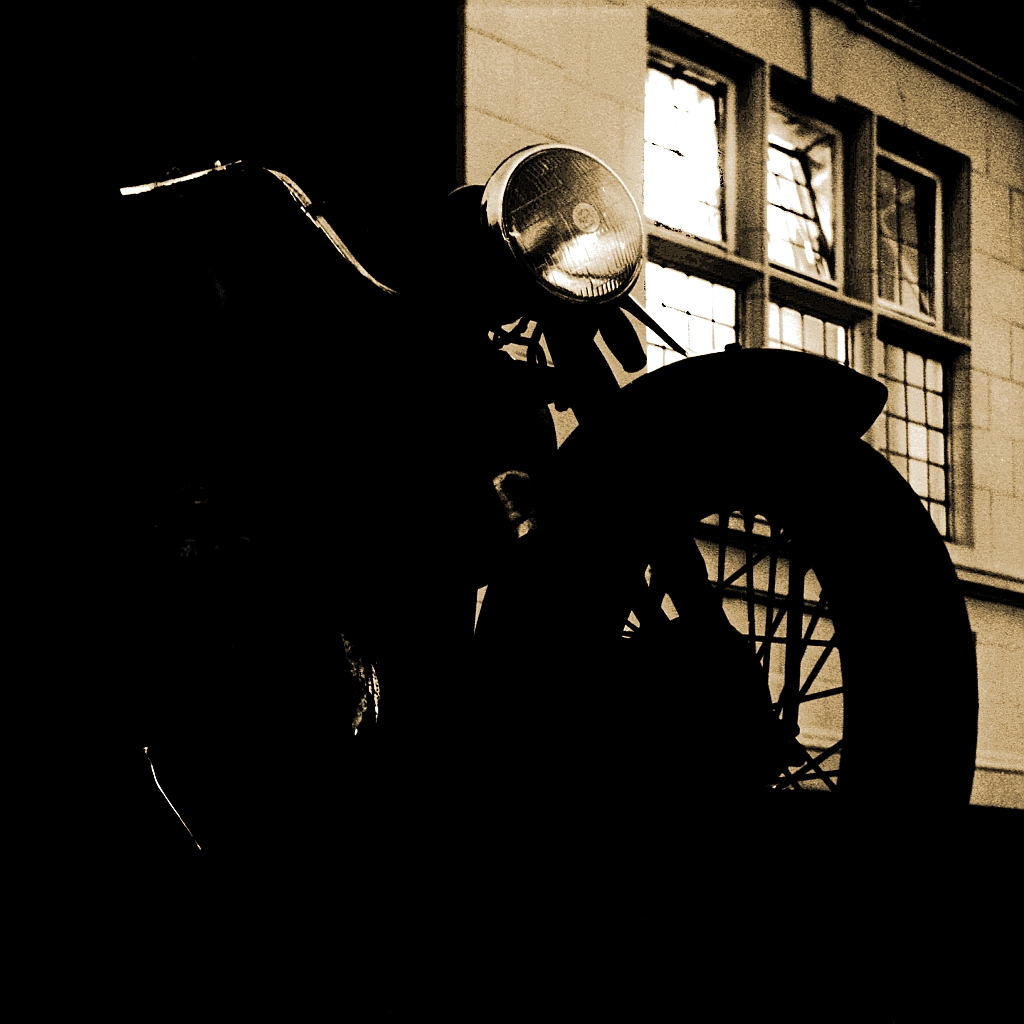
Why over-expose at all? Well, if you don’t have the information present on the negative, then you can’t use it later. I’ve got a picture of a mate’s bike that actually has good exposure – there is loads of detail of the engine. But I chose to render it very dark for effect. I could also render it ‘straight’ and show what make and model of bike it is. But without the exposure that captured the detail I would only have one option.

So what I can say is that over-exposing negative film by a stop seems to work, especially if you then develop in 510-pyro.

Neat trick.

The art of noise

It’s taken me a while to break the 400 ISO barrier, but it turned out the hurdle was in my head. Let me explain… photography and I go back a bit: we have history. Ilford HP5 was my fast film of choice, usually at 400 ISO. I could push it faster, but it got grainy and contrasty. My ideal would have been wide-aperture lenses, but I couldn’t afford them. I had a fairly fast fifty at f1.7 but the widest that any of my other lenses got was f2.8. My longer lenses were worse – I had the usual 80-200 zoom but that was f4.5 wide open. Most sports were out of reach, unless I could get close or it was sunny.

When I finally dig’ed-up it was to an APS-C camera. Delightful though it was (and is) the sensor got pretty noisy above 400 ISO. The crop factor was useful though, as it made my big lenses longer. If I’d put a x1.5 teleconverter of my zoom to get a 300mm, I would have had an f9 maximum aperture. Pop the lens on the digibox and it stayed at f4.5. At 400 ISO and needing a shutter speed of at 1/500 or faster, that made a difference. My exposure table says that’s EV11, so plenty of room for the occasional cloud.

Ugly noise

Even so, I was hitting a limit above 400 ISO. Grain or noise in mono images can be part of the effect, but noise in colour images is less pleasant. I was struggling. A day came when I was planning to take pictures at a race track and needed the longest lenses I owned and the fastest shutter speeds I could get. And then a more modern digital camera strolled up and said “hold my beer”. So I put the camera onto shutter priority and turned on the auto-ISO. And it worked. I was getting good, as in not noisy or grainy, pictures at ISO figures bigger than my phone number. So it’s not all advertising hype – modern sensors really can do high ISO.

Sometimes even flash won’t cut it

The benefit of this is that I can use smaller or cheaper lenses. I had a 35-70 zoom that would previously have stayed at home, as it was only f3.5 at the wide end. It would have meant slow shutter speeds or being difficult to focus with a dark image. But now there’s no problem in using 800 ISO, it lives on the camera as it’s compact and a useful range. I was recently at a camera fair and found a 70-210 zoom that I would previously have ignored, as the aperture ran from f4 to 5.6. But this also meant the lens was not huge: it’s about the size of a soft drink can. Stick it on the camera and it’s not too heavy or unwieldy.

1600 ISO

And yes, I understand that without wide apertures I’m losing the effects of bokeh and background separation. But I’m gaining sharpness by being able to use faster shutter speeds. Besides, a bit of panning will blur the background nicely when I’m shooting action.

6400 ISO

So really it’s a confidence thing. Back in the day I could push film above 400ISO but the results weren’t great. Same with my APS-C digital. But a more modern sensor will do much higher ISO without degrading into noise and fuzz. I’m learning to trust it. This old dog is learning a new trick.

PS Between writing this and posting it I found Joe Edelman’s explanation of why we should not fear the reaper grain. So now I’ve got another little project on to determine the maximum useable ISO of my cameras.

Getting real

So Leica have launched a camera that certifies its images. The M11-P writes encrypted metadata into the image that can be checked later. The idea is that anyone can check a picture to see if it was altered or when it was originally taken. This is meant to reassure viewers that the image has not been faked or generated by an AI, and that it is not being passed-off as being from a different time or place.

Well, good luck with that. It looks from the review like every picture the camera takes includes encrypted data, and the camera writes the data into the image file. So I could take a series of pictures, changing only one variable, and compare the metadata to see what changes? At the very least I’ll be able to find where the encrypted data is stored in the file. It may not be too hard to then overwrite one set of data with a different set, even if I haven’t cracked the encryption. The Content Authenticity Initiative say not, but having both the cleartext (the camera) and the ciphertext (the pictures) available should make cracking the encryption fairly routine. Of course, the cost of the camera is a barrier to entry, but a trivial one for a government. The Leica website says that the encrypted certificate in an image may be checked against a website that will verify the contents and show any editing. So if I can’t afford a Leica I might be able to fling a set of images at the website to have it read the cleartext back to me. And if I was trying to crack the encryption, the website would mark my homework.

DIY Photography have more information, and also say that this has been tried before and rapidly cracked. There seem to be some other camera-makers planning to add the CAI (poor choice of initials) feature, so the cost barrier to cracking the system will be lowered. It has probably already been cracked though – go and see Ross Anderson’s research page.

To be fair, the same was true of physical media like negatives. Once the source file (image file or negative) is in someone else’s hands, it can be altered. We’ve all heard of Russian leaders or VIPs vanishing from official photographs when they fall from favour. Of course, a physical negative is a pretty true record of what the camera saw, but it’s certainly impractical and probably impossible to also see the original negative when you are looking at a scan or print.

Perhaps what the Authenticity code ought do then is not try to add code to the original picture file, but to create a description of it that can be compared later? If the camera produced a description (a hash) that the photographer could post to a checking database along with a copy of the image, then that might provide a method for checking if a picture you are looking at exists as an original. So perhaps Press photographers or their publishers could post the pictures they are authenticating to provide a public method for checking that other uses of that picture are not misrepresentations? Except that if you wanted to cheat you would add extra copies of the same picture to the database with different metadata. This is a perennial problem: good people design systems that work when good people use them, but hackers are always looking for ways the system can fail or be induced to.

Some people just don’t follow the rules

There is also a risk with any system of authentication that people accept the assurance without checking. So if a picture has a CAI Authenticated marker, it is assumed to be true without further checks. It would be the same as waving a fake ID badge around. Perhaps then, the best assurance is the image-searching tools that already exist? They work by finding similar images, so loading a news photograph into one may show where that (or a similar edited image) has been used before. You might hope that any social media system would have this source-checking built-in, so that a posted picture claiming to show something would be flagged to the earlier, correct use of the picture. But, as any fule kno, social media only cares about engagement, not truth. The famous ‘dress that broke the internet’ was a good example: loads of people posted and reposted it, so why interfere when you’re getting views?

Easily refuted, as the fossil record shows no four-armed cavemen.

Anyway, what I think I’ve circled back to is that I think this scheme to embed authentication in pictures is well-intention but likely to fail. The tools already exist to check for prior use, but are rarely used. After all, nobody expends effort to prove themselves wrong.

PS speaking of which… not long after posting this Kate Middleton did a Photoshit that caused all the photo agencies to pull the picture to protect their reputations. So at least some checking is going on, even though it’s not by the people who created and issued the picture.

PPS – one of the prompts I was given by a reader led to someone who may be able to get this authentication thing to work.

PPPS – the same person does image analysis, and had some interesting things to say about the Kate picture.

PPPPS – I was sad to hear of the death of Ross Anderson.

Winding down

What do we do when it’s all over? Giving up a sport is easy – I can sell or give away any remaining kit and just stop doing whatever it was. Photography leaves a residue of pictures though. Who will care? It’s not like I’m famous and they will be acquired by a gallery. There’s not even enough pictures of any one place to interest a local museum. So what do I do with it all?

A collection of prints is one thing. They survive a long time and they are easy to understand. Negatives rely on someone having the means to look at them, and without that means they are likely to be thrown away. Digital files may be easier to view but are also easier to lose or delete. You’ve also to hope that the medium is still readable. I inherited a box of video tapes from my dad but I’ve yet to try transferring them to digital. Somewhere in the box is the tape of the transfer we did many years ago to move all the 8mm film home movies onto the wonderful new medium of VHS.

It all sounds rather morbid, but it will happen. At some point I will stop taking pictures. What do I then do with the pictures I have accumulated? My kids probably won’t be interested – why would they? My pictures are mostly of things they have never seen and require skills they aren’t interested in. I know that I inherited a pile of old negatives and pictures from my parents and grandparents, but that’s different because I’m interested in pictures and memory. To anyone else it would be a chore. But I don’t want to just throw their stuff or my stuff away. It shouldn’t end with me, but I’m not sure where it can go next. (Brief interlude for a Roy Batty moment)

Perhaps I put the negs and files into a sealed and dry box, label it well and list it amongst my effects. I can add the external drive I back up all my scans and digitals onto as well, as the pictures have easily-read descriptions with them. If it survives, good. If it doesn’t, I won’t be here to care. It meant a lot to me as I created them, but there’s no reason why it would mean anything to anyone else. Thinking a bit further, I should include in the box the scanner frames, as these are the easiest way to hold a negative to see or scan what is on it. If anyone was interested in the contents of the box, having the frames would remove one hurdle.

Don’t leave nasty surprises

If I did this, the box would actually be under the control of my wife or our kids, as the pictures contain a lot of our lives together. So yes, it would make sense to include the basic tools to be able to use the contents.

Putting my pictures into a box wouldn’t be a bad idea to start now. They would all be in one place rather than scattered, and would be better-protected than they are now. I know there is a counter-argument that putting everything in one place means that one accident can destroy it all, but film is a unique medium, so there is only one copy unless you scan it. If I put the backup drive in with the film then I still have the separate live working hard drive in a different place.

I feel the beginnings of a plan. And, getting morbid again, it would be a lot easier for me to arrange than someone else. So, a large plastic box with a watertight lid is now on the shopping list.

The kids should be outside the box, looking in

But what about my cameras? Who cares? The cameras are mass-produced machines. They don’t contain the pictures I took. The cameras have no value other than their ability to take pictures. If the cameras were all given to a charity shop or sent to landfill it wouldn’t remove one memory from my archive of pictures. Ideally I (or someone) would sell them, just like I would with old sports kit. That extracts from them the only value they could provide.

What a morbid subject! On the other hand, planning for the future removes some current anxiety. Knowing what to do with all this stuff makes me calmer, and it also means I’m not leaving a mess for others. Not that I intend this plan to be needed for many years yet, but you should always dig your well before you are thirsty.

Hitting the buffers

Cameras have become very capable, with clever automation making it easy to get a reasonable shot. They also got loaded-up with feature-bloat, with more menus and options than you can reasonably use. I’ve heard people expressing anxiety that they don’t know everything about how their camera works. But is mastery of the machine essential? Perhaps it would be more accurate to ask if mastery of the entire machine is essential? Do you have to know everything, or do you need to know enough to get what you want as an outcome? After all, the point of taking a picture is the picture, not the camera. And, in a nod to the title, what do you do when you hit a limit?

It got me thinking about motorcycle racing and motorcycle trials. The rider of a racing bike is a master at managing the grip of the tyres and of shifting their weight around to get the maximum cornering speed. A trials rider is a master at balancing the bike at low speed and of finding the traction to climb obstacles without stopping or falling off. Both can ride right to the limit of what their machine is capable of, but just in those specific aspects. The bikes themselves are made to do that specific task as well as possible. The bike-makers and the teams will be making constant modifications to improve just a few aspects of the machines, to stretch their capability in the areas that matter. If this was photography you would have one camera made specifically for sports and action, and a different one made for macro or portraits. But we don’t. What we buy is a camera that we hope, by changing lenses or settings, will do everything that we desire. And now that the camera is actually a computer, it’s easy to add features.

So have you ever hit a limit? And what do you do when it happens?

I have been delighted with the capabilities of my digital cameras for sports photography, and I don’t feel I’ve reached their limit yet. I used to shoot motorcycle racing and trials on film, and frankly it was hard work. Then I swapped to a modest 10mp digital camera with an APS-C sensor, which was half the size of my old film slr and a fraction of negative size of my tlr. And yet it resolved the engine number on a bike. Using film I had always struggled with dim lighting in the woods or the glory of a Yorkshire summer (warm rain). Digital gave me a better flashgun and the ability to tweak the settings on the fly. I did hit a limit on that digital slr with a poor high-ISO performance, but the crop factor of the small sensor gave me some usefully extended long lenses for the racing bikes. Ultimately though, I hit two limits: the high-ISO noise and the lack of wide angle lenses.

I’m also bumping the limits on my digital compact. The wide end of the zoom is not as wide as I’d like, amongst other things. I use it underwater, and for various reasons the wider the lens the better when you’re down under. The underwater housing I use has a flat glass port for the lens, which has the effect of making the field of view narrower due to refraction. So in effect my 35mm (equivalent) lens becomes a 50mm (equivalent), meaning that its angle of view drops from 54 to 40 degrees. What I’d like is something in the region of a true 15-20mm lens field of view, so around 85 to 100 degrees. Some underwater housings allow supplementary lenses to be attached to get that wider angle. I used to have one of these, but it was a film camera and I flooded it. My digital camera housing doesn’t take extra lenses, so at some point I’m going to have to splash out (ho, ho) on new kit (or new to me). It will genuinely be because I’ve hit the limit though: I need something with a very wide to normal zoom, good high-ISO performance, and good flash controls. Ooh, and the ability to record in raw, as underwater shots need a bit of colour correction and contrast adjustment. And better macro too – the current camera is a faff to get into macro mode and then further faff to get it focused. But, a bit like trials and racing bikes, there are a few cameras specifically made for the job. I’m tempted, as my pal has one and it does seem to work quite well with no risk of flooding. But I’m well known for being as tight as a crab’s arse so I’m unlikely to buy new. Which is why I’ve got a search set up on eBay. What counts against it though is that it is dedicated. With a normal camera in a housing I can still use the camera when I’m not diving. This is useful if I’m spending a lot of money (did anyone say ‘tight’?).

The sad thing is that I’ve already hit the limits a couple of times before. I somehow thought a manual film camera would be great underwater because it was iconic. It was, but it was also awkward. The replacement was a small digital compact, but that turned out to be too limited so I upgraded. And now I’m thinking of upgrading again. At least I managed to sell the old kit for at least what I’d paid for it each time. See what I mean about being tight?

As for the APS-C camera, that has already been replaced. (No, superseded, as I still have it.) The new one is full-frame, so I’m not likely to be hitting its limits for a long time, if ever. It has the extra high-ISO performance I need and takes all my wide angle lenses. It also uses my clever flashgun, so I can do proper synchro-sun and second-curtain flash, which I want for action shots. Talking of features, it can also be changed to APS-C mode and it even has more pixels in half-frame mode than the old one. I’ve used this to get an instant 1.5x extension on a long lens to getter tighter framing on an aircraft. A very useful feature, as it gives me the best of both.

And another limit – I’ve got a couple of action cameras that I also use underwater. One is a Contour Roam with a housing. This has been a great piece of kit, once I put it on an old camera flash bracket to link it to a framer-finder and a video light. I also picked up a cheap GoPro type job with a housing. This is tiny, so it’s easy to carry about. It has a very wide lens built in. But it needs to be on a bracket to use. Lots of people put them on a selfie stick, as that lets you get the camera in very close to wildlife. It does tend to magnify every camera movement though, so it’s easy to induce sea-sickness in the audience. Neither of them has good low-light performance and the resolution isn’t great. It’s ok for video, but part of the joy is being able to grab single frames as stills. But the dedicated underwater camera I’m looking at also does video, so perhaps I can settle on just one device?

But, if I think about how I use the cameras and how I am hitting their limits, I may want something different. What I need from the stills camera is better flash performance, easier macro and a wider lens. I do want a bit of zoom though, as it’s useful if you need to get better framing or can’t get closer. The video cameras are probably fine as they are – a bunch of diver pals watched my video of a close encounter with some boisterous seals, and they never once complained about the resolution.

Current digital rig

So there we go: a shopping list. And it’s upgrading my kit for what you could say are the right reasons – that I’ve hit a limit on doing the types of things I need to do to get the pictures I want. Not that I mind anyone upgrading to chase the features or to have the latest: this is how I get good stuff second-hand. So when do you think people upgrade and sell the old stuff – at the end of the summer when the diving is over, or at the beginning when they are planning the year’s dives? That’s when I need to go shopping.

Design a site like this with WordPress.com
Get started